ACTA has held several “roadside repair” workshops. This is the handout from the most recent one, organised by Colin Quilter. If you want the handout in a printable form (2 sides of A4), here it is:

The most common roadside incident is a puncture….
Rear wheel removal
- Shift the chain to the smallest cog on the rear cassette.
- On rim brakes: release the cable to spread the pads.
- Slacken the quick-release, bend the lower (tension) pulley of the derailleur forward and the upper (guide) pulley
backwards by hand, and pull the axle out from the drop-outs. - Hydraulic disc brakes: insert a plastic “keeper” between the brake pads to hold them apart. If no keeper is available, be careful not to squeeze the brake lever! Cable-operated disc brakes don’t have this problem.
Tire removal

- Work around the tire squeezing the beads together, breaking them away from the rim.
- Position the wheel so (with you at 6 o’clock) the valve is at 3 o’clock or 9 o’clock.
- Insert one tire lever at 6 o’clock, and lever the bead outwards.
- Work around the tire again, squeezing the beads together.
- Insert another lever about 100mm from the first, lever the bead outwards.
- Work around the tire again, squeezing the beads together.
- Insert a third tire lever, the bead should now be loose enough to pull it free from the rim.
Locating the puncture
- BEFORE separating tire and tube, use chalk to mark them both (so you can later reconstruct the position of the tube in relation to the tire).
- Inflate the tube; look, feel and listen for escaping air.
- Once the puncture is found in the tube, place it back alongside the tire (using the chalk marks to restore its former position) and look for a sharp object embedded in the tire at the correct location.
- Alternatively: to find the sharp object, run your fingers around the inside of the tire. When they start bleeding, you’ve found it.
Repairing the puncture
- Abrade the tube around the puncture, taking care to completely remove a moulding ridge if one is nearby.
- Spread a thin layer of glue, allow to dry for a few minutes. Warmth is helpful.
- Remove the foil backing from a patch, apply it, press firmly. Don’t attempt to remove the plastic or paper backing on top of the patch. The tube can be inflated immediately.
Refitting the tube and tire
- Pump just enough air into the tube to give it some shape. Fit it inside the tire (without twists or kinks).
- Starting at the valve, work the tire back onto the rim. When it starts to get difficult, squeeze the beads together on the side opposite where you are working, (see diagrams A and B above). You might need to temporarily deflate the tube. Avoid using tire levers if possible. If they are necessary, be careful not to pinch the tube!
Replacing the wheel
- Reverse the steps taken to remove it.
- Check the wheel revolves smoothly and the rim is equidistant between the brake pads. If not then the wheel axle is not seated properly in the frame drop-outs. Check the brakes before riding!
Broken chain
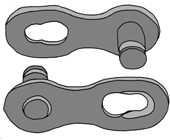
The easiest repair is to use a “missing link” (= “master link”). A missing link is in two halves. Each half comprises an outer side plate and a pin. The length of the pins must match the width of your chain, (which in turn depends on the number of cogs in your cassette). For example you might purchase a “9-speed missing link.”
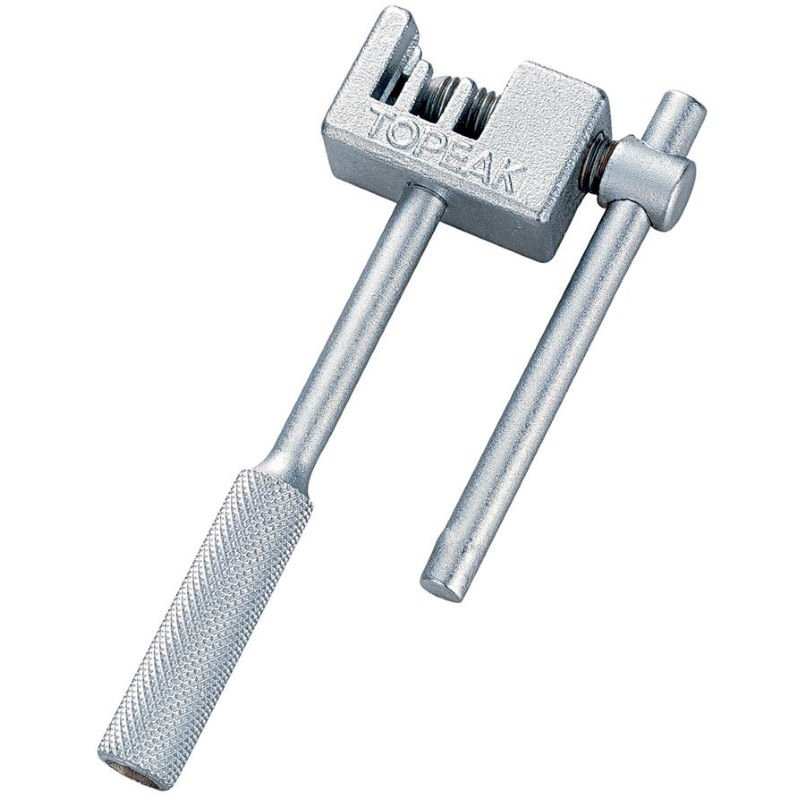
You will also need a chain tool; without one the job is nearly impossible.
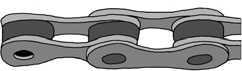
A broken chain usually has one (good) end with inner side plates and roller intact.
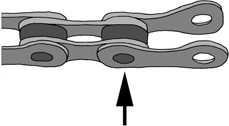
The other (damaged) end will probably have outer side plates still attached. Use a chain rivet tool to drive out the rivet at the damaged end (arrowed) in order to remove the outer side plates.
Now both ends of the chain will be “good” with undamaged inner side plates and rollers. Join the ends with the missing link. Tension on the chain will hold the two halves of the link together. The repair is permanent, and the chain is usually restored to its full length.
Bad gear changing
The following comments apply to the rear derailleur, but the same principles apply to the front.
- If you have had smooth gear changes for weeks or months, and suddenly gear changes become noisy and rough, the problem is almost certainly caused by breakage of a few wire strands in the derailleur cable. The cable then stretches slightly. Now you need to shorten it.
- Look for the barrel adjuster where the derailleur cable housing emerges from the shifter (on the handlebars); rotate it one turn anticlockwise. This has the effect of lengthening the cable housing and therefore shortening the cable.
- If that does not restore smooth shifting, try another anticlockwise turn.
- Fit a new cable when you get home. Consider replacing the cable housing too, if it is years old.
Broken derailleur cable.
Rear derailleur: spring tension in the derailleur will pull it outwards, so the guide pulley sits below the smallest (high gear) cog. You can ride home in a high gear, but it is much better to get a middle gear in the following way:
If a good length of cable is still attached to the derailleur, lash it to the bike frame with enough tension to pull the derailleur onto one of the middle cogs.
Alternatively, push the derailleur inwards by hand until the guide pulley is below one of the middle cogs. Then wedge a short length of stick into the parallelogram linkage of the derailleur. Experiment to find the right size of stick. On my bike it is about as thick as my little finger. Spring tension will hold the stick in place.


Front derailleur: spring tension will pull the derailleur cage inwards, so that it sits above the smallest chainring. You can ride home in a low gear, but it is much better to get a middle gear in the following way:
If enough cable is still attached to the derailleur, pull the derailleur cage above the middle chainring by hand and then lash the cable to the frame with sufficient tension to hold the derailleur in that position.
Alternatively, pull the derailleur cage above the middle chainring by hand and then wedge a stick (on my bike slightly thicker than a pencil) into the derailleur parallelogram to hold it there. Spring tension in the derailleur will hold the stick in place.
A toolkit for the roadside
The first three items are essential, the remainder are discretionary.
- Spare tube
- Set of 3 tire levers
- Pump
- Puncture repair kit, incl. chalk to mark tire and tube
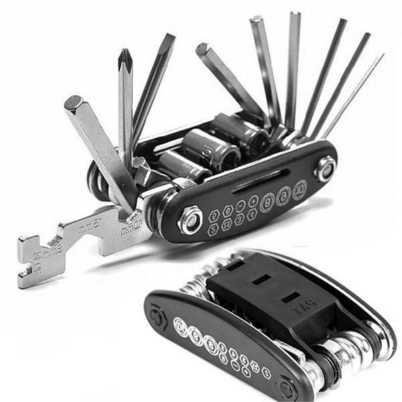
- Multi-tool with Allen keys and two small screwdrivers, (Phillips and flat blade)
- Chain rivet tool
- A missing link of the correct size for your chain
- If you have hydraulic disc brakes: a plastic “keeper” to hold the pads apart
- One or more tire boots (to splint a damaged tire)
- Small adjustable spanner (say 4 inch = 100mm)
- Small selection of 4 and 5mm bolts
- Cheap pair of spectacles
- To avoid oily hands: a few disposable wipes and/or disposable polythene gloves
Special Message for e-bike Owners
Sooner or later you will suffer a puncture. You can be sure that someone in your group will be carrying a pump and tire levers, and will be happy to help you deal with the puncture on the roadside.
However, your friends WON’T be carrying:
1) A spare tube to fit your tire.
2) Any special tool necessary to remove the wheel from your bike. Some e-bikes have unusual axle fittings, (ie. not the quick-releases which for years have been standard). For example, some e-bikes require an Allen key; some need a spanner (perhaps 15 or 18mm). Have a close look at your bike, find out what’s needed to get the wheels off, and make sure you carry the tool. Automotive shops like Repco sell single spanners of any size; you don’t need to buy a set. A fixed spanner of the correct size is less likely to damage the nut than an adjustable spanner.
Please do your riding companions a favour, and check these two things before your next ACTA ride.